See the details with diagrams,shown below :----
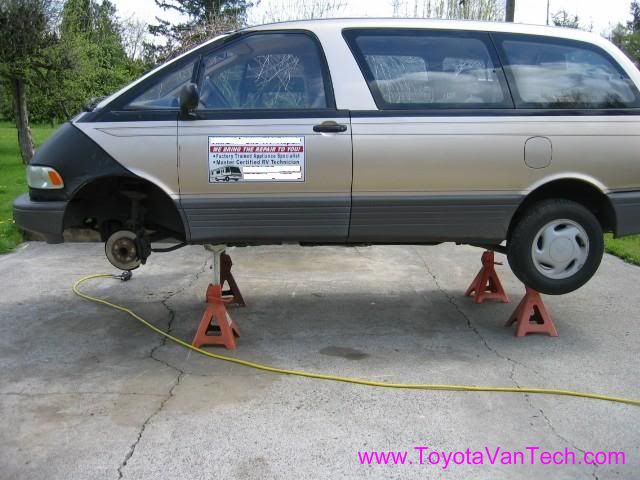
Lift the Van
to keep it simple and leave the cams installed. Unfortunately they block access to the head bolts and must be removed before taking off the head.
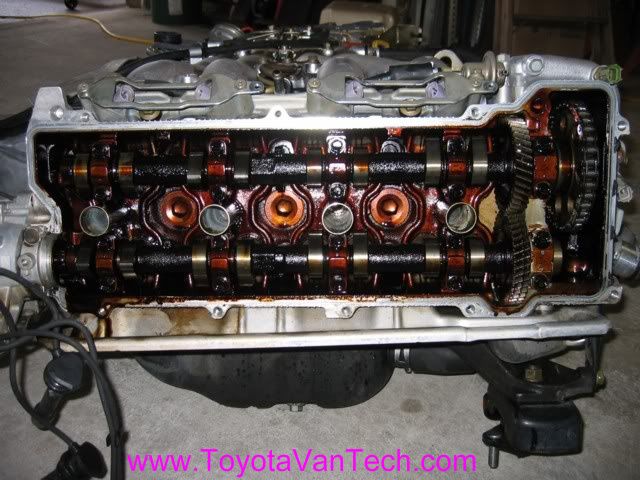
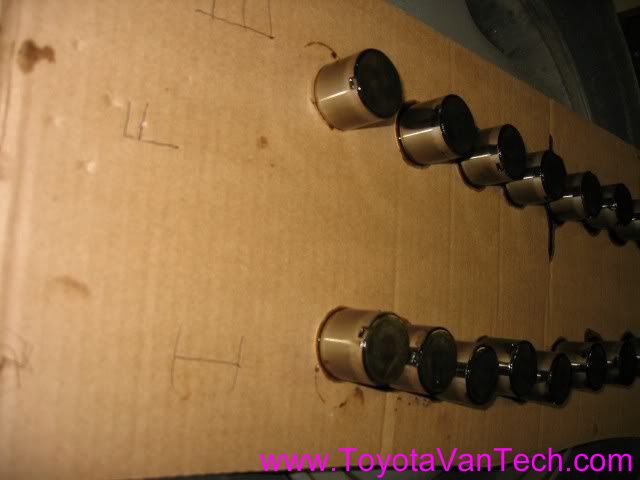
After removing the cams, the valve shim assy's must be removed or they will fall out while handling the head. It is very very important to keep these in order. Unless you plan on re-shimming and replacing, they must be reinstalled in the exact location they were taken from. I used a piece of cardboard to keep them in the correct order.
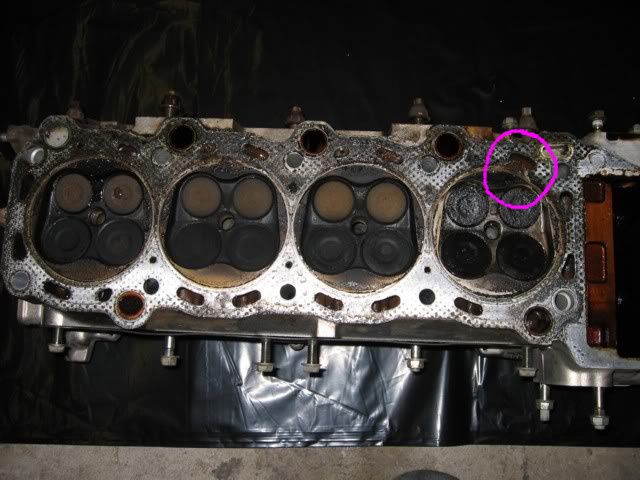
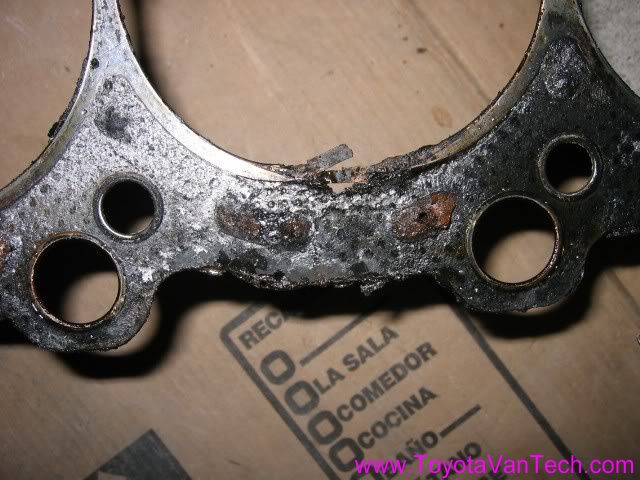
Well, looks like the diagnostic was correct. A blown head gasket is definitely the problem here. #1 was unintentionally steam cleaned by vaporizing coolant!

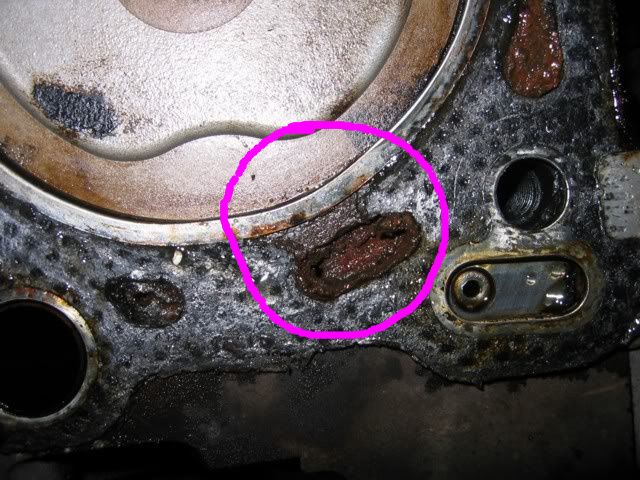
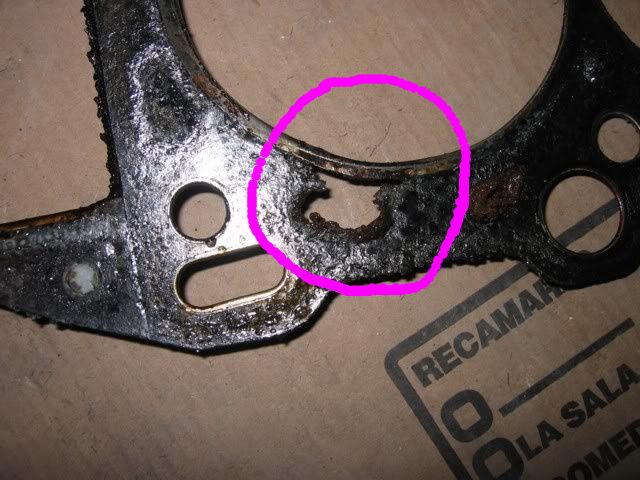
Here is a close-up of the trouble spot. You can see a definite path between the water jacket and the cylinder.
view of the underside of the head
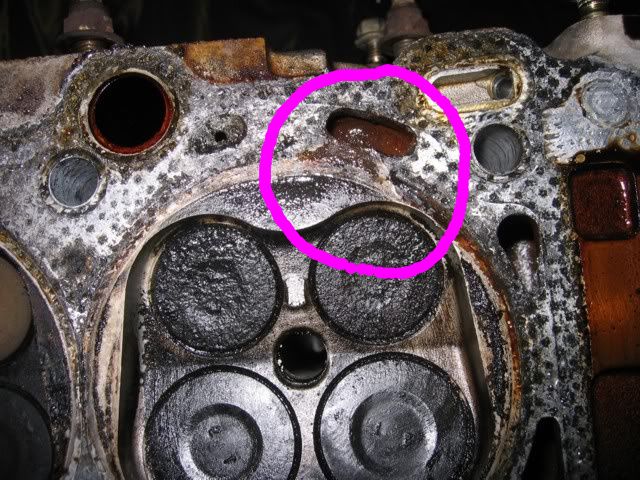
A close-up of the trouble spot
Close-ups of the removed gasket
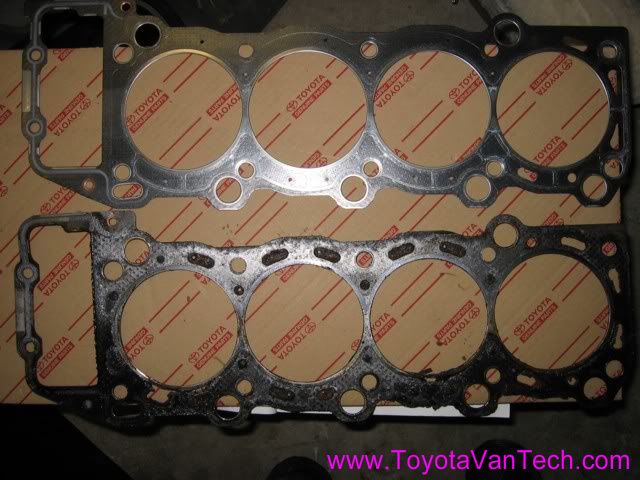
New gasket has more metal in it. The new design probably wouldn't have helped much against the type of failure I had. It would however protect against blowing of the gasket between the water jacket and the exterior of the engine.
For clean-up and prepping of metal surfaces, I use a 2" angled die grinder with scotch brite surface conditioning pads. I prefer this color for head gaskets.
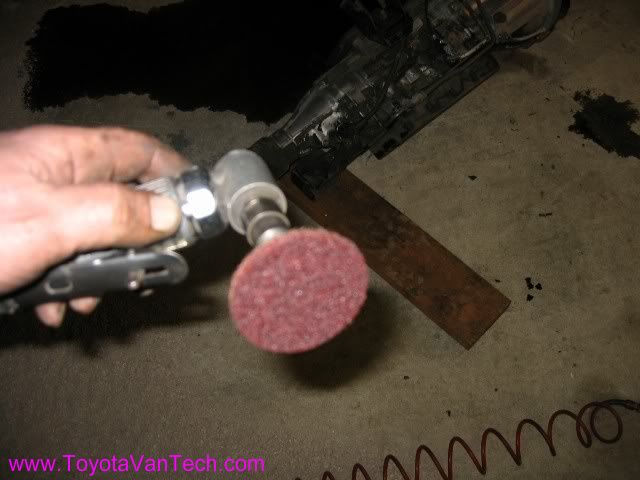
Grinding should done carefully in patterns parallel to the outside diameter of the cylinders. This type of conditioning pad will allow controlled removal of gasket material without damaging metal surfaces. It will however leave small microscopic grooves in the metal. This is good and will aid in bonding of the new gasket (gives it something to bite into)
This details will help.
Lift the Van
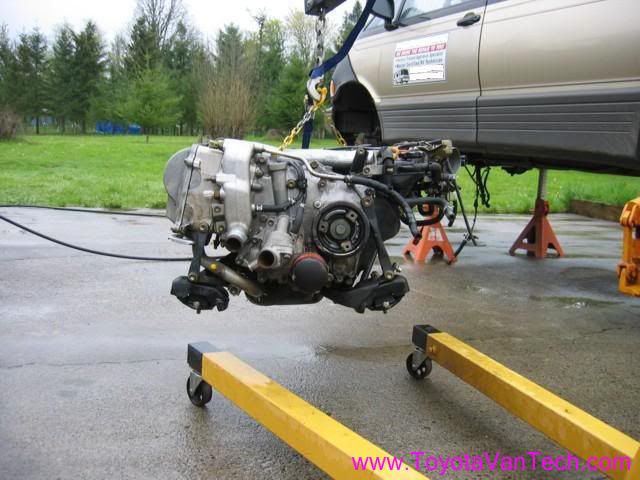
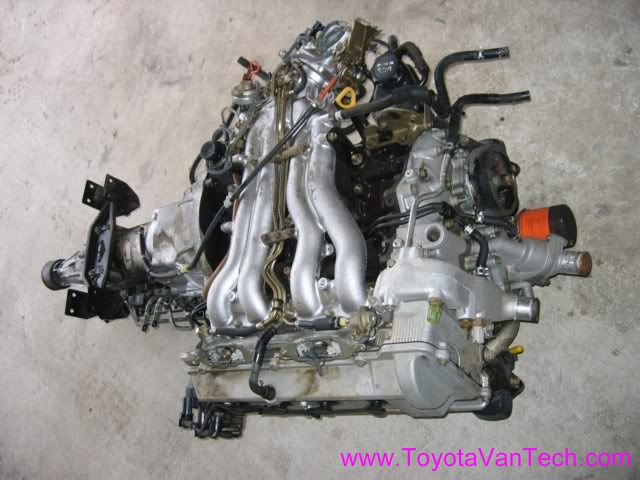
Engine needs to be dropped
to keep it simple and leave the cams installed. Unfortunately they block access to the head bolts and must be removed before taking off the head.
After removing the cams, the valve shim assy's must be removed or they will fall out while handling the head. It is very very important to keep these in order. Unless you plan on re-shimming and replacing, they must be reinstalled in the exact location they were taken from. I used a piece of cardboard to keep them in the correct order.
Well, looks like the diagnostic was correct. A blown head gasket is definitely the problem here. #1 was unintentionally steam cleaned by vaporizing coolant!
Here is a close-up of the trouble spot. You can see a definite path between the water jacket and the cylinder.
view of the underside of the head
A close-up of the trouble spot
Close-ups of the removed gasket
New gasket has more metal in it. The new design probably wouldn't have helped much against the type of failure I had. It would however protect against blowing of the gasket between the water jacket and the exterior of the engine.
For clean-up and prepping of metal surfaces, I use a 2" angled die grinder with scotch brite surface conditioning pads. I prefer this color for head gaskets.
Grinding should done carefully in patterns parallel to the outside diameter of the cylinders. This type of conditioning pad will allow controlled removal of gasket material without damaging metal surfaces. It will however leave small microscopic grooves in the metal. This is good and will aid in bonding of the new gasket (gives it something to bite into)
This details will help.